Replacing Variable Valve in FinePointe WBP Controllers
Note: These steps are designed for WBP Controllers manufactured in 2016 or later. Ensure that the driver board has the separated connectors that step 4 shows before you cut any wires in step 5.
- Disconnect chambers and calibrator from the controller, then power it down and unplug power.
- Open the lid by unscrewing the 11 screws around the top (3 per short side and 5 on the long side in the back).
- You may have to use a flathead screwdriver to help pry the lid off once the screws are out.
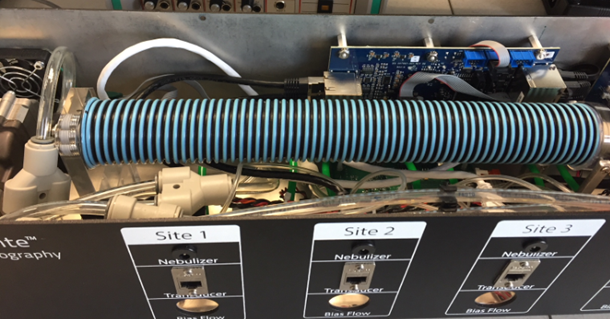
- Locate the valve that you want to replace just inside the site you want to fix (in this example, Site 1).
Note: If your valves or connectors have numbers written on them (the below screenshot says “3”), these numbers do not correlate with the site numbers.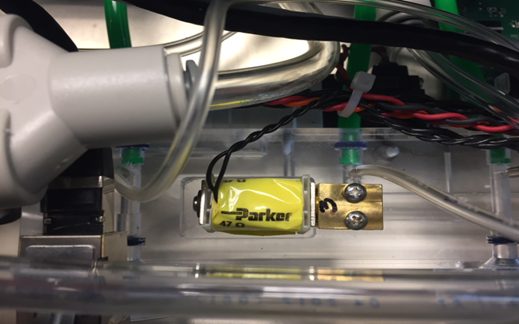
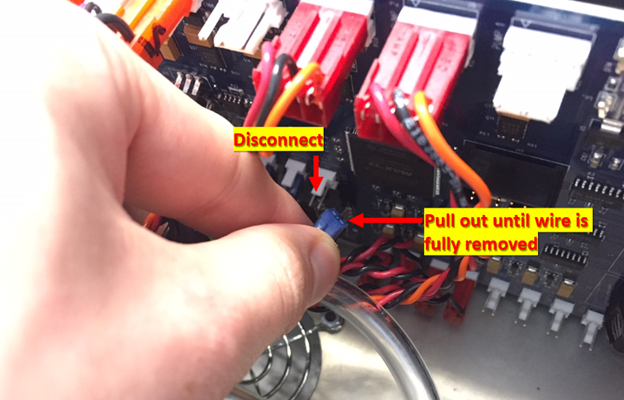
- Locate the connector from the valve to the driver board on the back-right side of the Controller..
Note: these are in opposite order from the valve locations: the connector for Site 1 is the furthest to the right whereas Site 4 connects to the leftmost spot.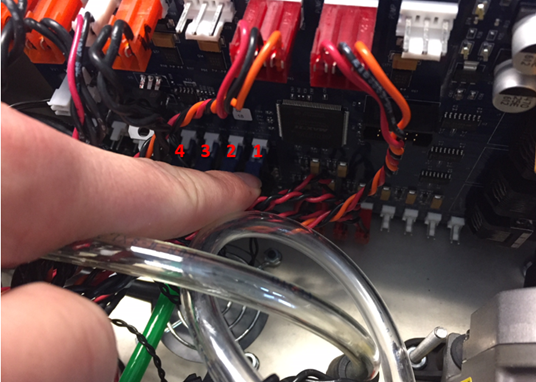
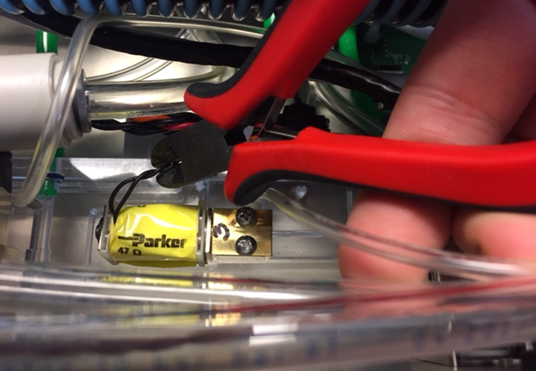
Note: If your driver board does not look like the above picture, it is an older model that the following steps will not work on. Contact Technical Support. - Now that you know which valve will be replaced and where the new one will connect, you can cut the wire to the old valve.
- Unplug the connector you located earlier from the driver board, and pull the entire length of wire through the wire bundle until the cut end is out.
- Using a Philip’s head screwdriver, remove the two screws securing the valve to the acrylic manifold.
- Note: Be cautious when handling the screws—they can be difficult to retrieve if they fall inside the unit.
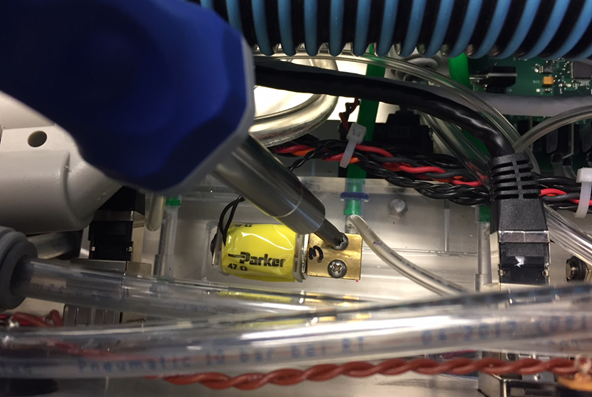
- Note: Be cautious when handling the screws—they can be difficult to retrieve if they fall inside the unit.
- Once the screws are removed…
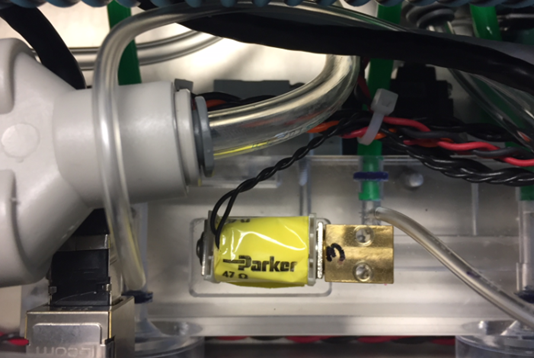
- Lift off the valve. Ensure that the two black O-rings remain in their proper location on the manifold; they may stick to the bottom of the valve as you remove it, but be sure to place them back properly.
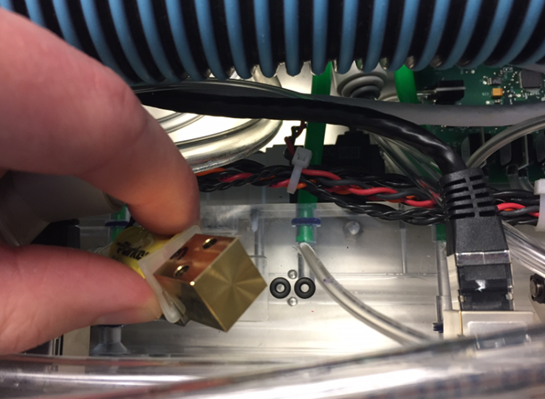
- Put the replacement valve (p/n 601-4002-001) in the same location, taking care that the O-rings stay in place, and screwing them back in with the same screws
- Note: You will want to make sure the valve is screwed in tightly, however do not overtighten it or else the O-rings may flatten and restrict the opening which could cause a calibration error.
- Connect the other end of the wire into the same location on the driver board where the original valve was connected (in steps 3 and 5).
- Note: You do not have to bundle the wires together—that is simply to keep the inside tidy, but is not necessary from a functionality standpoint. Simply have any excess wire length coiled inside the unit.
- Replace the lid and plug everything back in.
Can't find what you're looking for? Contact Us
Comments
0 comments
Please sign in to leave a comment.