Installing TRX Firmware
Prior to installing, it is recommended to review the TRX Firmware Release Notes. The following are the instruction to install the firmware update.
Obtaining Firmware Files
Please note that you will need to reach out to Support (support@datasci.com) to get the latest TRX Firmware files or by Submit a Request>Request Firmware Download. Save the firmware file to a location on your hard drive. Make a note of this location for Step 8 below.
TRX Firmware Compatibility
Newer TRX Firmware versions may not be compatible with older versions of TRX Hardware. Module versions of the TRX hardware are compatible with all versions of the TRX firmware if the update is performed at the DSI facility, but it will not be compatible if the update is performed in the field. CSP versions of the TRX are not backwards compatible with older firmware (1.21248 or 1.30009).
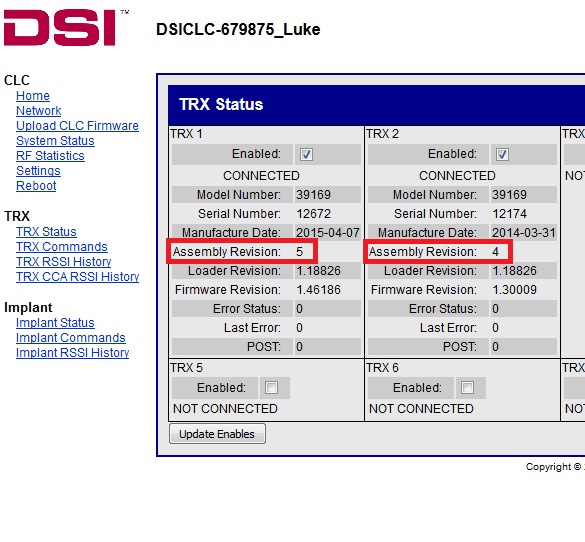
Accessing the TRX Status page from the CLC webpage can tell what version of the TRX is connected to the CLC. The assembly revision of 4 is a module TRX. Assembly revision of 5 is a CSP TRX.
Installing TRX Firmware
- Launch Ponemah.
- Select the Hardware | PhysioTel Digital Telemetry Diagnostics…
Note: If using Ponemah v5.20, select Hardware | Diagnostics…
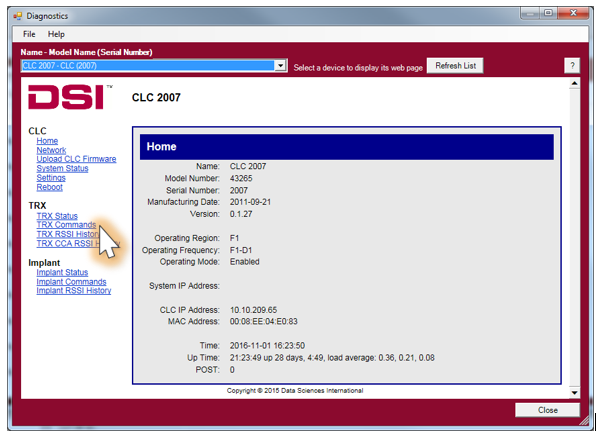
- Choose the CLC from the Name – Model Name (Serial Number) dropdown.
Note: Select the Refresh List button if the CLC does not appear in the dropdown list.
- Select the TRX Commands link from the list view on the left side of the diagnostic page.
- Select the TRX number for the firmware update from the TRX No.
Note: The TRX number corresponds to the CLC jack that the TRX is connected to.
- Select Upload Firmware from the TRX Command dropdown.

- Click the Browse button and navigate to the firmware file (*.bin) that was provided.

- Navigate to the file location for the TRX firmware, select it, and click OK.
- Click Send.

- After the firmware has been updated, verify the firmware revision by clicking on the TRX Status link from the left menu.
Comments
0 comments
Please sign in to leave a comment.