Ponemah v5.20 - Noldus Media Recorder 2.6 Quick Start Guide
The following outlines the process required to configure video cameras using Ponemah v5.20 and Noldus Media Recorder 2.4.
Please note: Noldus Media Recorder v2.6 is compatible with Ponemah v5.20-SP5 within the v5.x line of Ponemah software. It is not compatible with the version 5.30+ nor the v6.x line..
Configure Cameras within Media Recorder
- Launch Ponemah
- Open the appropriate Protocol file to be used for the acquisition or use the default Protocol to start.
- Select Hardware| Video Configuration to launch the Noldus Media Recorder
- Click the Settings button, or choose File Menu| Settings

- In the Media Recorder Settings window, enable the video source by checking the checkbox under the Use column.
- Select your cameras from the dropdown list under Video device.
IP Cameras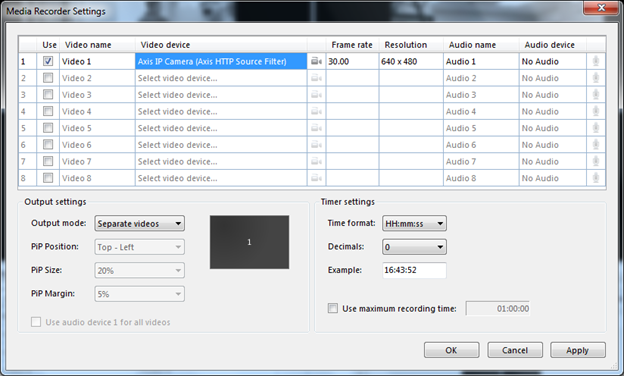
- Choose Axis IP Camera from the dropdown list.
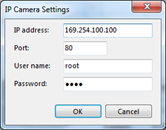
- Click the Camera Icon to access the advanced settings.
- Enter the IP Address of the Camera.
Note: The IP address can be obtained using the Axis Video Software. See Media Recorder 2.6 Service Manual Page 20 for more information. - Enter the User Name and Password.
Default Axis User Name/Password: root/root - Click OK.
- Select the preferred Frame Rate and Resolution. The options shown in these fields are dependent on your camera type. By default the optimal combination of frame rate, resolution and color space of your camera is selected. Should you not require the frame rate or resolution auto-selected, it is recommended to lower these to your required settings to reduce video file size. Please see the Noldus Media Recorder Manual for more information.
Note: If you increase the frame rate, the maximum resolution available goes down and vice versa. If you select an impossible combination of frame rate and resolution and format, the Media Recorder gives a warning (see below).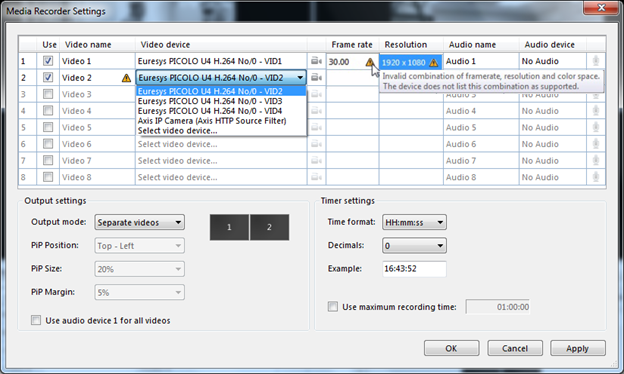
- Optionally you can change the names of video cameras. The name specified here will be displayed within Ponemah during the camera assignment process.
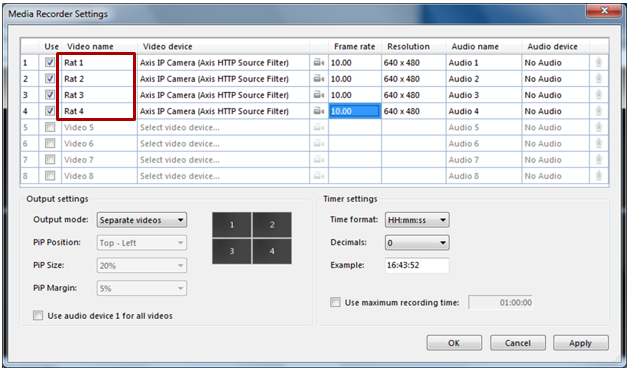
- Use the dropdown menu associated with Output mode to select Separate videos.
Note: Noldus Media Recorder v2.6 supports Picture-in-Picture (PIP) presentations during acquisition; however, Ponemah will not keep this presentation during playback of video files in Replay or Review.
- It is recommended to leave the Timer settings set to the default values.
- Click OK. The Media Recorder window now shows the selected cameras, settings and a preview of the videos.
- You can change the order of the video cameras by dragging and dropping rows. Click the Refresh button after you have done this.
- Once camera setup is complete, choose File| Exit to close Media Recorder and return to Ponemah to complete Protocol setup.
Assigning Cameras to Groups within Ponemah
Once the cameras are configured within Noldus Media Recorder, these cameras must be grouped with the physiologic data you wish to associate and sync the video data to within the Ponemah Protocol Setup.
- Select the Setup Menu| P3 Setup
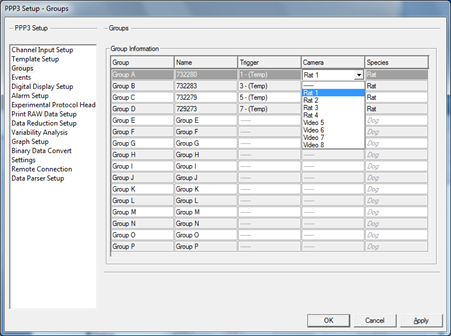
- Choose Groups from the options on the left
- Under the Video column, use the dropdown menu to select the appropriate video camera.
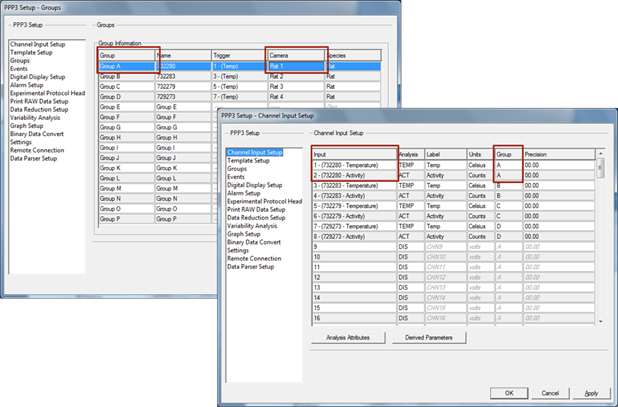
Note: Camera data is associated with a particular Ponemah Group and will therefore be synchronized with the data from the physiologic channels assigned to the same group, as defined in the Channel Input Setup.
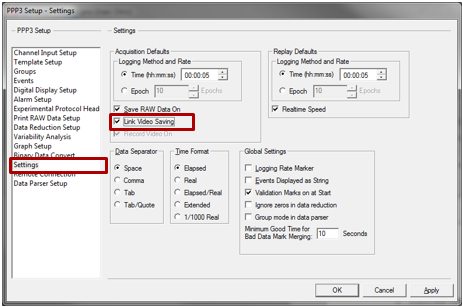
- Ensure Link Video Saving is enabled within Settings option.
- Click OK.
- Save the Protocol file by selecting Functions| Save Protocol.
- Video recording will commence upon starting an acquisition.
For more information, please see the Noldus Media Recorder Reference and Service Manuals.
Comments
0 comments
Please sign in to leave a comment.